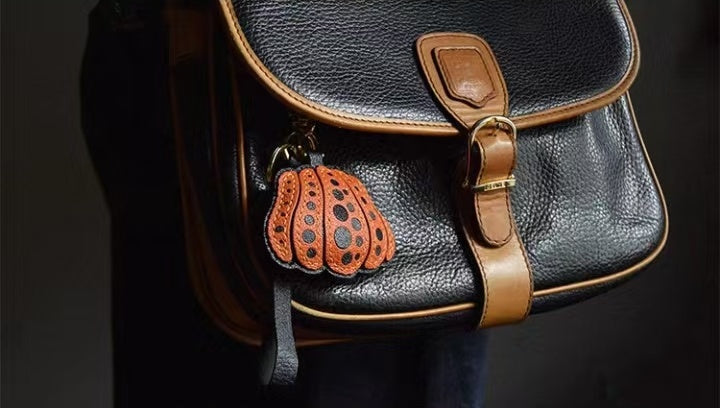
The Journey of a Pumpkin Charm: From Sketch to Stitch
Tiny, joyful, and handcrafted—this little accessory carries the weight of many precise steps and a quiet devotion to craft. With Halloween on the horizon, our pumpkin-shaped bag charm becomes a small ode to slow fashion, made by human hands from start to finish.
Step 1 — Design Sketch: Where ideas take shape
Before a single piece of leather is cut, the charm begins as a hand sketch. We explore silhouette, proportions, and the gentle curves that give a pumpkin its character. Dotted panels and seam placements are mapped on paper, ensuring the final piece feels playful yet refined.

Step 2 — Color Matching: Choosing a living palette
Color sets the mood. We test warm oranges against deep blacks, then sample thread tones to find a stitch that brightens without shouting. Pigments and swatches are compared under natural light so the charm looks vibrant both indoors and out.
Step 3 — Leather Cutting & Punching: Precision in every panel
Selected full-grain leather is cut into layered pumpkin panels. Edge lines are traced, holes are punched cleanly, and circular appliqués are prepared for the dotted motif. This is where accuracy matters—the better the cut, the cleaner the final assembly.
Step 4 — Edge Crafting: Smooth, strong, and comfortable
Edges are beveled and burnished for a soft, rounded feel. This step not only improves durability but also elevates the handfeel—no rough edges, no compromise. Meticulous edge work is one of those quiet details you notice every time you touch the charm.
Step 5 — Stitching & Assembly: The rhythm of the saddle stitch
Panels come together with traditional double-needle saddle stitching. Each pass tightens the structure and creates the charming contour lines that echo a pumpkin’s segmenting. The contrast thread adds a soft glow along the curves, turning functional seams into a design feature.
Step 6 — Final Touch: Hardware that completes the story
Polished gold hardware—keyring and lobster clasp—is attached last. The junction is checked for balance, movement, and long-term strength. A final wipe, and the charm is ready to catch the light on your favorite bag handle.

Why this little charm matters
In a fast world, small handcrafted objects remind us to slow down. Each dot, seam, and edge tells a human story—of careful choices, consistent hands, and materials that age beautifully.